
Mastering the Dotting Tool: Your Guide to Exquisite Nail Art Designs
The humble dotting tool, a seemingly simple implement, unlocks a universe of creative possibilities in the world of nail art. From delicate polka dots to intricate floral patterns, this versatile tool empowers both beginners and seasoned nail artists to achieve stunning results. This comprehensive guide dives deep into the world of dotting tools, exploring their various types, optimal techniques, and inspiring design ideas to elevate your nail art game.
Understanding Dotting Tools: Types and Materials
Dotting tools come in a variety of shapes, sizes, and materials, each offering unique advantages. Understanding these differences will help you choose the perfect tool for your desired effect. Here’s a breakdown:
- Metal Dotting Tools: These are the most common type, usually made of stainless steel. They are durable, easy to clean, and offer precise control. The double-ended design, featuring different sized dots, is particularly popular.
- Acrylic Dotting Tools: Often lighter and more flexible than metal, acrylic dotting tools can provide a slightly softer touch, making them comfortable for extended use. They are also available in a wide range of sizes and shapes.
- Wooden Dotting Tools: These are less common but offer a unique texture. Their porous nature makes cleaning slightly more challenging, but they can provide a more rustic or textured effect.
- Silicone Dotting Tools: These soft tools are great for beginners, providing some give and preventing harsh lines. However, they might not be suitable for highly detailed work.
Choosing the right material and size depends on your personal preference and the complexity of your design. Experiment with different types to find your perfect match.
Essential Techniques for Perfect Dots
Mastering the art of dotting involves more than just dipping the tool into nail polish. Here are some key techniques to ensure precision and consistent results:
1. Nail Polish Selection:
The viscosity of your nail polish significantly impacts the outcome. Thicker polishes produce bolder dots, while thinner polishes create more delicate ones. Experiment with different consistencies to achieve your desired look. Creamy polishes generally work best for beginners.
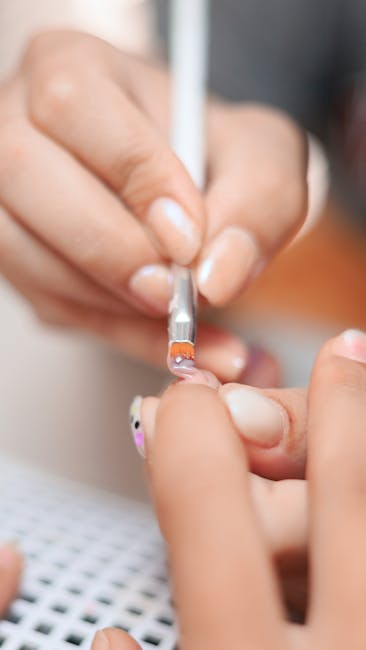
2. The Dip and Dot Method:
Gently dip the dotting tool into the polish, ensuring only a small amount adheres to the end. Avoid overloading, as this can lead to messy and uneven dots. Practice on a piece of paper first to get a feel for the ideal amount of polish.
3. Controlled Pressure:
Applying even pressure is key to creating uniform dots. Too much pressure can create smudges or distorted shapes, while too little pressure might result in faint dots. Practice maintaining a consistent, gentle touch.
4. Cleaning and Maintenance:
Clean your dotting tools thoroughly after each use. Acetone or nail polish remover is effective for most materials. Proper cleaning prevents polish buildup and ensures the longevity of your tools.
Beyond Basic Dots: Creative Nail Art Designs
Once you’ve mastered the basic dotting technique, the possibilities are endless. Here are some inspiring design ideas you can create using a dotting tool:
1. Polka Dot Manicures:
A classic and timeless design, polka dots can be adapted to suit any style or occasion. Experiment with different color combinations, dot sizes, and patterns to create a unique look.
2. Floral Designs:
Using a combination of dot sizes and colors, you can create intricate floral patterns, from simple daisies to elaborate roses. Start with basic shapes and gradually build up complexity.
3. Geometric Patterns:
Dotting tools are ideal for creating geometric patterns such as stripes, chevrons, and tessellations. Experiment with different angles and distances between dots to achieve a variety of effects.
4. Animal Prints:
Recreate animal prints like leopard spots or dalmatian spots by strategically placing dots of varying sizes and shades. This playful design offers ample room for creativity.
5. Abstract Art:
Let your imagination run wild and create abstract nail art designs using a combination of dots, lines, and colors. Don’t be afraid to experiment and create unexpected patterns.
Tips and Tricks for Beginners
- Start with simple designs before tackling more complex ones.
- Practice on a non-porous surface before applying to your nails.
- Use a base coat to protect your nails and ensure better polish adhesion.
- Apply a top coat to seal in your design and enhance its longevity.
- Don’t be afraid to experiment with different colors and techniques.
- Watch tutorial videos for visual guidance.
- Use a thin layer of polish on the dotting tool to avoid smudging.
- Clean your dotting tools regularly to maintain their shape and accuracy.
- Invest in a set of dotting tools with various sizes for greater versatility.
- Be patient and persistent; mastering dotting takes time and practice.
With practice and patience, you’ll master the art of using a dotting tool and create beautiful, intricate nail art designs that will turn heads. So grab your tools, choose your colors, and unleash your inner artist!
